How to Configure Image Data Augmentation in Keras TensorFlow
 By Prantik Sarkar
Training deep convolutional neural networks on more data can lead to an increase in its performance and generalization capacity. Limited training data can cause the model to overfit. This article will help you understand how you can expand your existing dataset through Image Data Augmentation in Keras TensorFlow with Python language.
We’ll understand what data augmentation is and how we can implement the same.
Image Data Augmentation
Data augmentation is a method of increasing the size of our training data by transforming the data that we already have. Image Data augmentation similarly is a technique where we expand our training dataset by creating modified versions of the images that already exist in our training data. Keep in mind, that these newly transformed images also belong to the same class as the original image. Augmentation both expands our training data and introduces heterogeneity in it thereby reducing the model’s tendency to overfit. It must be performed carefully. For e.g. a vertical flip of a photo of a dog will not make sense but a horizontal flip will because the photo can be taken from either left or right.
Keras provides us the ability to perform Image Data Augmentation automatically when training our model using the ImageDataGenerator class. It has a variety of methods for Image Data Augmentation but we’ll focus on the 5 main strategies namely:
- Image Rotation
- Horizontal and Vertical flipping
- Zooming
- Image Brightness
- Image height and width shifting
The ImageDataGenerator class accepts the original training data, transforms it, and returns only the newly transformed data for the model to be trained on. But as these transformations/augmentations are applied randomly, this provides both the modified images and the images with almost no transformations for use during training.
Also read:
- How to choose number of epochs to train a neural network in Keras
- Understanding convolutional neural network(CNN)
- Image Classification using Keras in TensorFlow Backend
Image Data Augmentation using ImageDataGenerator
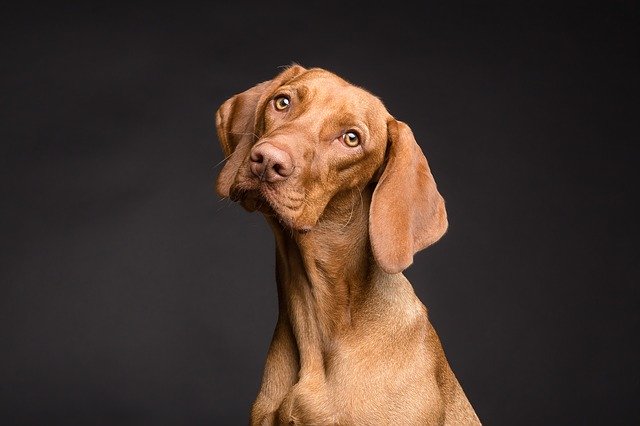
Image to be used for illustration :
Before beginning with Image Augmentation, let us import the required libraries.
import matplotlib.pyplot as plt
import numpy as np
from keras.preprocessing.image import load_img
from keras.preprocessing.image import img_to_array
from keras.preprocessing.image import ImageDataGenerator
The ‘img_to_array’ function converts a PIL image to a NumPy-array of pixels
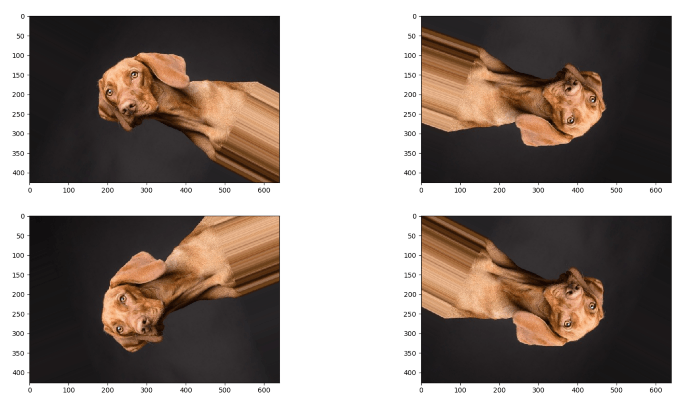
Image Rotation
This augmentation randomly rotates the image clockwise by the specified number of degrees between 0° and 360°. Rotation can be configured using the ‘rotation_range’ argument of the ImagedataGenerator class.
See the Python code below:
# loading the image
image = load_img('dog.jpg')

# converting the PIL image into a numpy array of pixels
image = img_to_array(image)

# expanding dimensions
samples = np.expand_dims(image, 0)

# creating Image data augmentation generator
datagen = ImageDataGenerator(rotation_range = 120)

# preparing the iterator
iterator = datagen.flow(samples, batch_size = 1)

# generating and plotting the augmented images
for index in range(4):
  # defining the subplot
  plt.subplot(220 + 1 + index)
  # generating the batch of images
  batch = iterator.next()
  # converting to unsigned integers for viewing
  image = batch[0].astype('uint8')
  # vewing the augmented image
  plt.imshow(image)
Here, first we initialize an object of the ImageDataGenerator class. We then create the iterator which is called four times in a loop and plot each augmented image.
OUTPUT:
Horizontal & Vertical flipping
A Horizontal flip will flip the image w.r.t the vertical axis whereas a Vertical flip flips the image w.r.t the horizontal axis. As the image of a dog is being used, vertically flipping will make no sense in this case.
# loading the image
image = load_img('dog.jpg')

# converting the PIL image into a numpy array of pixels
image = img_to_array(image)

# expanding dimensions
samples = np.expand_dims(image, 0)

# creating Image data augmentation generator
datagen = ImageDataGenerator(horizontal_flip = True)

# preparing the iterator
iterator = datagen.flow(samples, batch_size = 1)

# generating and plotting the augmented images
for index in range(4):
  # defining the subplot
  plt.subplot(220 + 1 + index)
  # generating the batch of images
  batch = iterator.next()
  # converting to unsigned integers for viewing
  image = batch[0].astype('uint8')
  # vewing the augmented image
  plt.imshow(image)
OUTPUT:
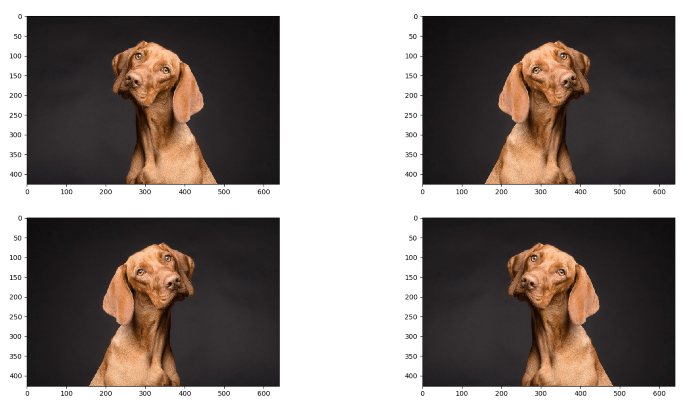
As we can see, horizontal_flip was randomly applied to some images and not others.
Zooming
A zoom augmentation can randomly zoom in/out of the image. Image zooming can be configured using the ‘zoom_range’ argument of the ImageDataGenerator class. A zoom_range of [0.6, 1.4] indicates zooming between 60% (zoom in) and 140% (zoom out). Values < 1 will zoom the image in, thereby making the objects in the image larger whereas values > 1 will zoom the image out thereby making the objects smaller. A zoom of [1.0, 1.0] will have no effect on the original image.
# loading the image
image = load_img('dog.jpg')

# converting the PIL image into a numpy array of pixels
image = img_to_array(image)

# expanding dimensions
samples = np.expand_dims(image, 0)

# creating Image data augmentation generator
datagen = ImageDataGenerator(zoom_range = [0.3, 3])

# preparing the iterator
iterator = datagen.flow(samples, batch_size = 1)

# generating and plotting the augmented images
for index in range(4):
  # defining the subplot
  plt.subplot(220 + 1 + index)
  # generating the batch of images
  batch = iterator.next()
  # converting to unsigned integers for viewing
  image = batch[0].astype('uint8')
  # vewing the augmented image
  plt.imshow(image)
OUTPUT:
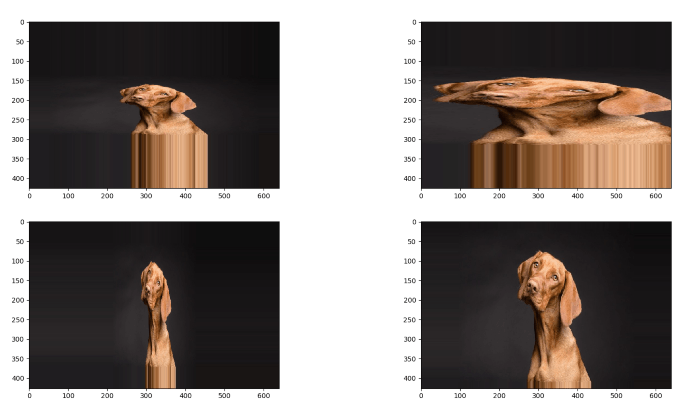
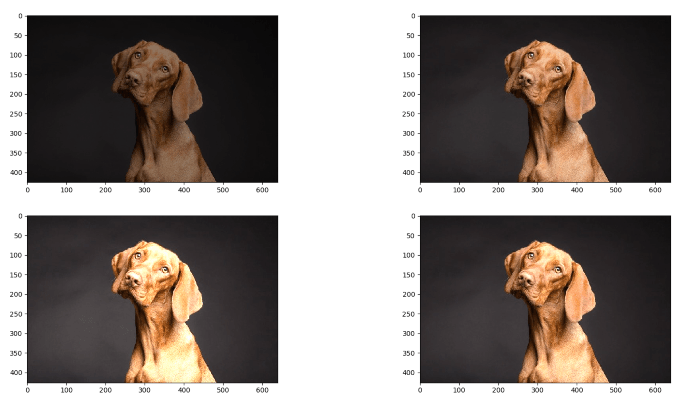
Image Brightness
This augmentation will alter the brightness of the image. It can be configured using the ‘brightness_range’ argument of the ImageDataGenerator class. Values > 1 will brighten the image whereas values < 1 will darken the image.
# loading the image
image = load_img('dog.jpg')

# converting the PIL image into a numpy array of pixels
image = img_to_array(image)

# expanding dimensions
samples = np.expand_dims(image, 0)

# creating Image data augmentation generator
datagen = ImageDataGenerator(brightness_range = [0.3, 1.5])

# preparing the iterator
iterator = datagen.flow(samples, batch_size = 1)

# generating and plotting the augmented images
for index in range(4):
  # defining the subplot
  plt.subplot(220 + 1 + index)
  # generating the batch of images
  batch = iterator.next()
  # converting to unsigned integers for viewing
  image = batch[0].astype('uint8')
  # vewing the augmented image
  plt.imshow(image)
OUTPUT:
Height & Width shifting
Height_shift will shift the image in the vertical direction whereas width_shift shifts it in the horizontal direction. To configure this augmentation, we use the ‘height_shift_range’ and ‘width_shift_range’ arguments of the ImageDataGenerator class. These parameters can either be a floating-point value (between 0 and 1) indicating the percentage of width or height of the image to be shifted or the number of pixels to be shifted.
# loading the image
image = load_img('dog.jpg')

# converting the PIL image into a numpy array of pixels
image = img_to_array(image)

# expanding dimensions
samples = np.expand_dims(image, 0)

# creating Image data augmentation generator
datagen = ImageDataGenerator(height_shift_range = [-110, 110], width_shift_range = 0.4)

# preparing the iterator
iterator = datagen.flow(samples, batch_size = 1)

# generating and plotting the augmented images
for index in range(4):
  # defining the subplot
  plt.subplot(220 + 1 + index)
  # generating the batch of images
  batch = iterator.next()
  # converting to unsigned integers for viewing
  image = batch[0].astype('uint8')
  # vewing the augmented image
  plt.imshow(image)
OUTPUT:
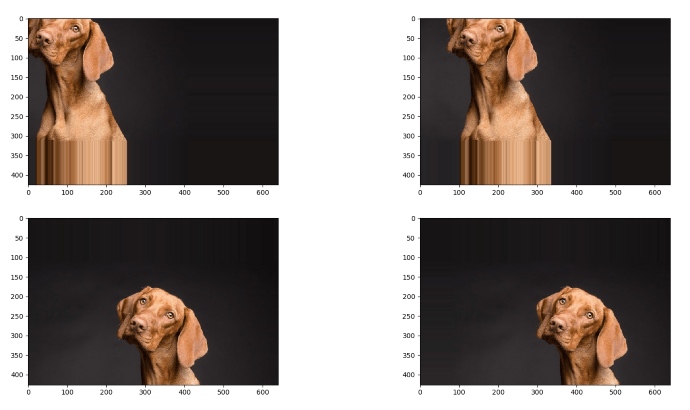
If you want to adjust the replicated pixels in the image, you can do so by using the ‘fill_mode’ parameter.
Applying augmentation in a CNN
Now let us learn how to apply Image Data Augmentation on your training data before you fit your model to it. The model we’ll implement will be a cat v/s dog classifier. The dataset in total has 8000 images, 3000 in each category in the training set, and the remaining 2000 images in the test set (1000 in each category).
# Importing the required libraries
from keras.models import Sequential
from keras.layers import Convolution2D, MaxPooling2D, Flatten, Dense

# Defining the CNN architecture
model = Sequential()

model.add(Convolution2D(32, 3, 3, input_shape = (64, 64, 3), activation = 'relu'))
model.add(MaxPooling2D(pool_size = (2, 2)))

model.add(Convolution2D(32, 3, 3, activation = 'relu'))
model.add(MaxPooling2D(pool_size = (2, 2)))

model.add(Flatten())

model.add(Dense(output_dim = 128, activation = 'relu'))
model.add(Dense(output_dim = 1, activation = 'sigmoid'))

model.compile(optimizer = 'adam', loss = 'binary_crossentropy', metrics = ['accuracy'])


# Applying Image Augmentation before fitting the model on the dataset

from keras.preprocessing.image import ImageDataGenerator

# 'rescale = 1./255' transforms every pixel value from range [0, 255] to [0, 1].
train_datagen = ImageDataGenerator(rescale = 1./255,
                                   zoom_range = [0.6, 1.4],
                                   height_shift_range = [-110, 110],
                                   width_shift_range = 0.3,
                                   brightness_range = [0.3, 1.4],
                                   horizontal_flip = True)

test_datagen = ImageDataGenerator(rescale = 1./255)

training_set = train_datagen.flow_from_directory('dataset/training_set',
                                                 target_size = (64, 64),
                                                 batch_size = 64,
                                                 class_mode = 'binary')

test_set = test_datagen.flow_from_directory('dataset/test_set',
                                            target_size = (64, 64),
                                            batch_size = 64,
                                            class_mode = 'binary')

model.fit_generator(training_set,
                    samples_per_epoch = 6000,
                    nb_epoch = 30,
                    validation_data = test_set,
                    nb_val_samples = 2000)
In conclusion, if you have relatively small training data, you can add more data points to it using Data Augmentation to improve your model’s performance.
Leave a Reply