Login Registration System using MySQL in Django
 By Aditi Deo
For any website, it is essential to authenticate the user to verify their identity. Therefore, in this tutorial, we will learn to setup login and registration system using MySQL in Django
Create a custom form for SignUp
Initially, we will create a custom form in a file named ‘forms.py’ which will be inherited from the UserCreationForm of auth. forms module. We will keep the fields as ‘first_name’, ’email’, ‘username’, ‘password1’, and ‘password2’.
You can check: How to connect MySQL to Django
The form will be based on the User Module provided by Python.
from django.contrib.auth.forms import UserCreationForm
from django.contrib.auth.models import User
class CustomUserCreationForm(UserCreationForm):
    class Meta:
        model=User
        fields=['first_name','email','username','password1','password2']


    def __init__(self,*args, **kwargs):
        super(UserCreationForm,self).__init__(*args, **kwargs)
        for name,field in self.fields.items():
            field.widget.attrs.update({'class':'input'})
Import modules and create signup View
For registration of the users, we will initially import the required libraries such as authenticate, login, HttpResponseRedirect, etc. Also, we shall import the CustomCreationForm from the forms.py file.
We will create a signup function, in which we first check whether the user is authenticated. If he is authenticated then we redirect him to the sign-in page. If he is not authenticated then we authenticate him by following the below-mentioned steps:
- We check if the method is POST. We display the CustomCreationForm to the user to fill in the required details.
- If the form is valid with no errors, then it saves it.
- The server checks the username and password and returns the User object if they are valid. If they are not valid then it simply returns None.
- It redirects the user to the sign-in page.
from django.shortcuts import render, redirect
from django.contrib.auth.forms import UserCreationForm
from django.contrib.auth import authenticate, login
from django.contrib.auth.forms import AuthenticationForm
from django.contrib.auth import logout
from django.shortcuts import HttpResponseRedirect
from .forms import CustomUserCreationForm
def signup(request):
    if request.user.is_authenticated:
        return redirect('signin')
    if request.method == 'POST':
        form = CustomUserCreationForm(request.POST)
        if form.is_valid():
            form.save()
            username = form.cleaned_data.get('username')
            password = form.cleaned_data.get('password1')
            user = authenticate(username=username, password=password)
            # login(request, user)
            return redirect('/signin')
        else:
            return render(request, 'signup.html', {'form': form})
    else:
        form = CustomUserCreationForm()
        return render(request, 'signup.html', {'form': form})
Create sign-in View
For login, we will create a sign-in function, in which we first check whether the user is authenticated. If he is authenticated then we redirect him to the home page. If he is not authenticated then we authenticate him by following the below-mentioned steps:
- We check if the method is POST. We will then take the username and password as input from the user.
- Next, the user’s credentials are verified by checking the username and password.
- If the user exists and is not None, then we pass the user object to the login function to assign permissions to the user for the current session.
- Else an error message will be displayed to the user and he will be redirected back to the login page along with the error.
def signin(request):
    if request.user.is_authenticated:
        return render(request, 'home.html')
    if request.method == 'POST':
        username = request.POST['username']
        password = request.POST['password']
        user = authenticate(request, username=username, password=password)
        if user is not None:
            login(request, user)
            return redirect('/profile') #profile
        else:
            msg = 'Error Login'
            form = AuthenticationForm(request.POST)
            return render(request, 'login.html', {'form': form, 'msg': msg})
    else:
        form = AuthenticationForm()
        return render(request, 'login.html', {'form': form})
Create a profile and home view
The home and profile functions give the user options for login and register and also after a successful login, it will display a hello message with the username.
def profile(request):
    return render(request, 'profile.html')
def home(request):
    return render(request, 'profile.html')
Create templates for sign-up and sign-in
Next, we will create HTML files for login and registration. It will extend from base.html which is the base HTML file. We will create a form that contains a for loop to iterate over every field and its label. A paragraph tag will display the errors.
{% extends 'base.html' %}

{% block content %}
  <h2>Sign up</h2>
  <form method="post">
    {% csrf_token %}
    {% for field in form %}
      <p>
        {{ field.label_tag }}<br>
        {{ field }}
        {% for error in field.errors %}
          <p style="color: red">{{ error }}</p>
        {% endfor %}
      </p>
    {% endfor %}
    <button type="submit" class="btn btn-success">Sign up</button>
  </form>
{% endblock %}
Singin.html
{% block title %}
Login
{% endblock %}
{% block content %}
<h2>Login</h2>
{{ msg }}
<form method="post">
{% csrf_token %}
{{ form.as_p }}
<button type="submit" class="btn btn-primary">Login</button>
</form>
{% endblock %}
Create urls.py file for the app
We will link all the views created to their respective URLs using the path function that takes the URL, view, and name as an argument.
from django.urls import path
from . import views
urlpatterns = [
path('',views.home,name="home"),
path('signin/',views.signin, name='signin'),
path('signup/',views.signup, name='signup'),
path('profile/',views.profile, name='profile'),
]
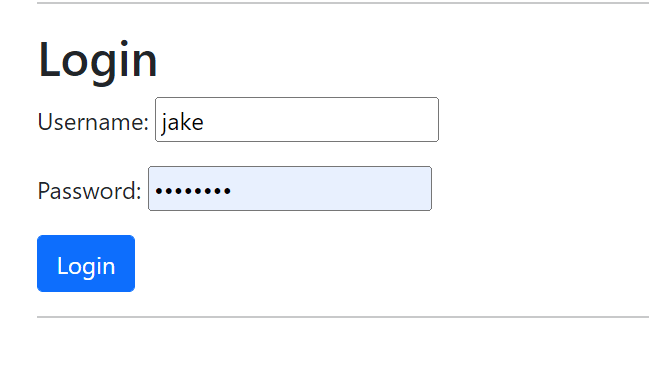
Output:


Thus we have reached the end of this tutorial.
Where is the profile.html bro? You did not show the content inside the profile.html file
{% extends ‘base.html’ %}
{% block title %}Login{% endblock %}
{% block content %}
Welcome!
{% if user.is_authenticated %}
Hi {{ user.username }}!
— Logout link —-
{% else %}
—-Login link—-
—-Signup Link—-
{% endif %}
{% endblock %}
Where is the base.html bro? You did not show the content inside the base.html file