How to integrate PayKun Payment Gateway in WordPress
 By Faruque Ahamed Mollick
In this article, I am going to let you know how you can integrate the PayKun payment gateway on your WordPress based site running with WooCommerce.
Before I go forward, let me tell you about both the WooCommerce and PayKun in brief.
WooCommerce is a free plugin for WordPress that can turn your WordPress site into a full-featured eCommerce store. This plugin, you can sell your products on your own website.
On the other hand, PayKun is an Ahmedabad based payment solution to accept payment online on websites and apps. It allows accepting credit cards, debit cards, net banking, wallet and UPI payments.
PayKun Payment Gateway features:
-
Provides 120+ payment options at one place in one checkout
-
PCI DSS Level 1 compliant, follows 256 Bit AES encryption and SSL Certified, in short totally non-hackable.
-
Supports website as well as application integration.
-
Payment links/master links can be used to collect online payments in case of no website
-
Seamless Integration to any platform – PHP, Magento, Android, iOS, WordPress, Ruby, Python, .Net, Node JS, Java, WHMCS, Prestashop, Opencart, etc
-
It is cheap due to its cost-effective per transaction charges of just flat 1.75% for domestic and 3% for international
-
Available Smart Merchant Dashboard for analytics and comparison with graphical representation, downloadable reports and transaction management tool.
-
Android and iOS PayKun Mobile Apps for convenient access to the dashboard.
-
Robust Customer and Client Support, Technical Support and Dispute Resolution Centre.
So as you already got some idea about WooCommerce and PayKun payment solution, now let me show you the steps to follow to use PayKun for WordPress.
Steps to integrate PayKun payment gateway in WordPress for WooCommerce store
PayKun has its own official WordPress plugin to work with WooCommerce. With this plugin, you can accept payment online from your WooCommerce store easily. Installing and setting up this WordPress plugin is quite easy. You can do it with your own just within few clicks in minutes.
Install the plugin
You can install this plugin by searching from the Plugins > Add New and search for “PayKun for WooCommerce” and click the “Install Now” button like you can see in the picture below:

You can also download the plugin on the PayKun plugin page of WordPress directly and upload it by going to Plugins > Add New > Upload Plugin.
After that install it and then activate it.
Configure PayKun to use on WooCommerce
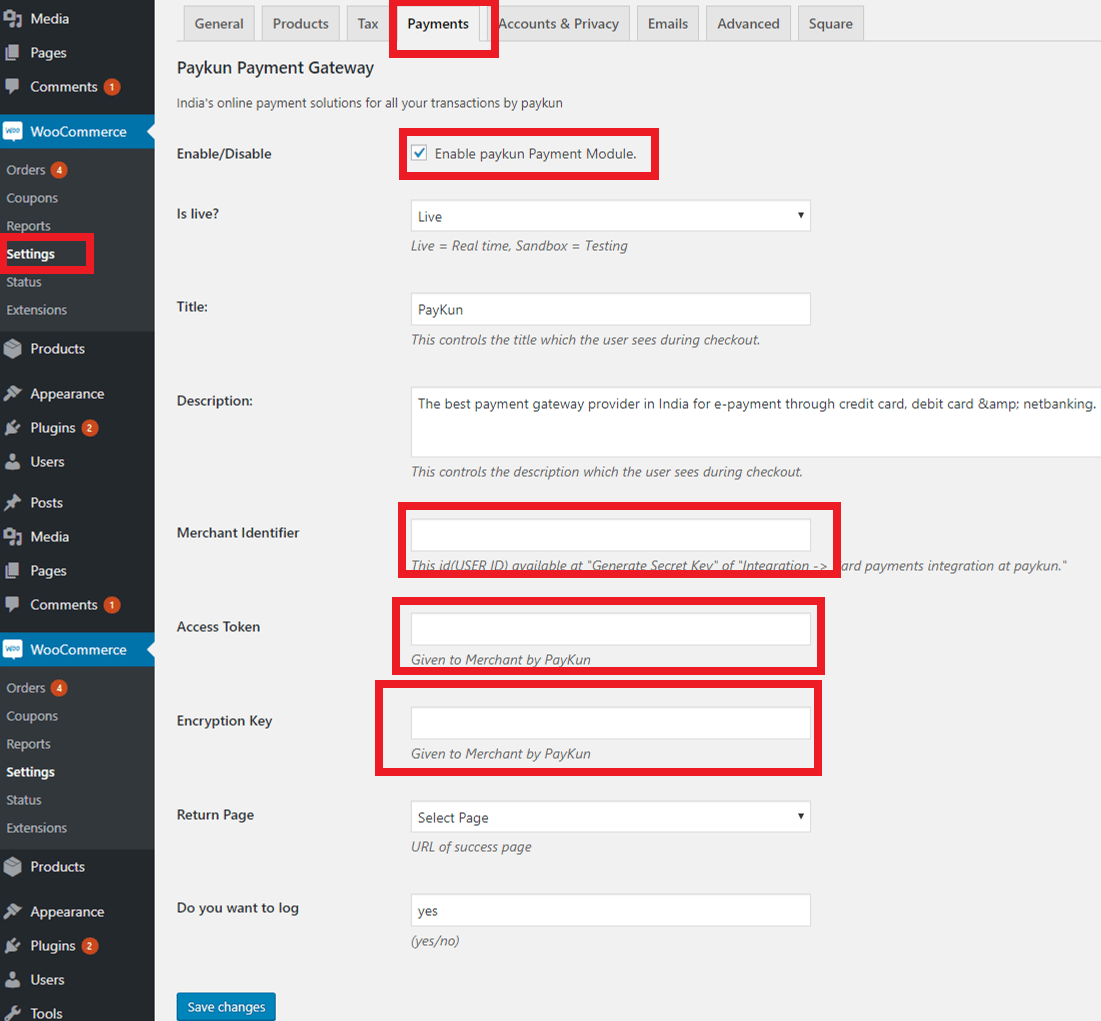
Now you have to enable, set up and configure the payment gateway. To do this, you have to go to WooCommerce > Settings > Payments > Paykun and put your Merchant ID, Access Token and Encryption Key that you will get from the Paykun service. See the image below:
If Paykun is enabled, you will able to see the Paykun payment option on the checkout page.
You have to sure that the Paykun API credentials are correct, otherwise, it will not work. If everything goes right, you will able to see the PayKun payment gateway working on your WordPress site.
I hope, this tutorial will be helpful for you.
Also, read: How to integrate PayKun Payment Gateway in PHP
Leave a Reply