How to create a custom Skybox in Unity3D
 By Y SAI KIRAN
Hello programmers, In this article, I will show “How to create a custom Skybox in Unity3D”
Let’s get started with the building process.
Step:-1
- First, we should download the HDRIs file from the link given below:-
http://polyhaven.com
- Download the suitable HDRIs file
Step:-2
- Import the HDRIs file in the Assets by right click and selecting the Import New Assets.

- Select the HDRIs file and press import.
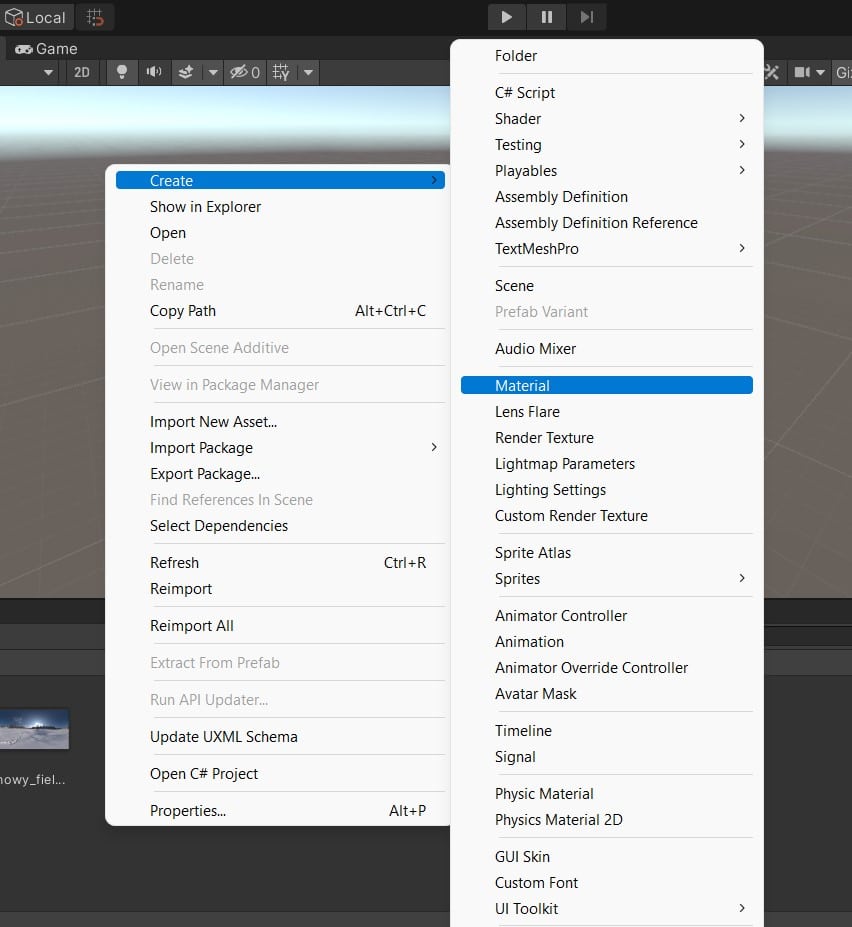
Step:-3
- Now create new material for our Skybox by right click and select Create then select Material and renaming it as Skybox.
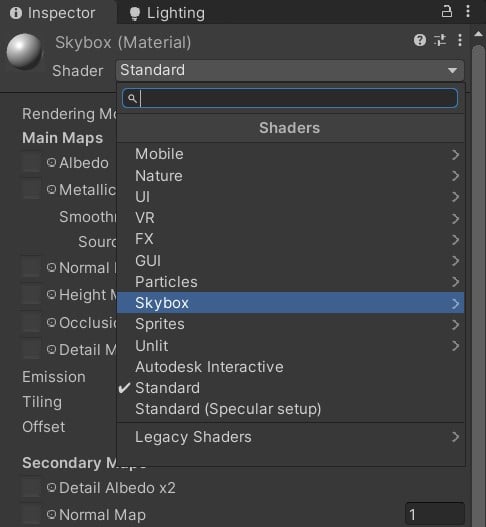
Step:-4
- Select the Skybox from assets, In the Inspector tab click on the Shaders drop-down and select Skybox
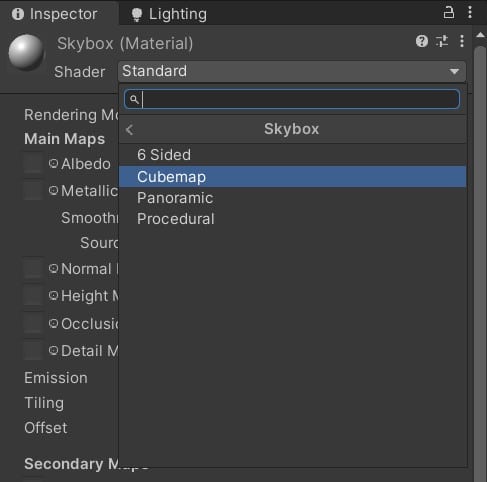
- Now select the Cubemap
Step:-5
- Select HDRIs file from assets, select Texture Shape, and select Cube

- Customize and Apply

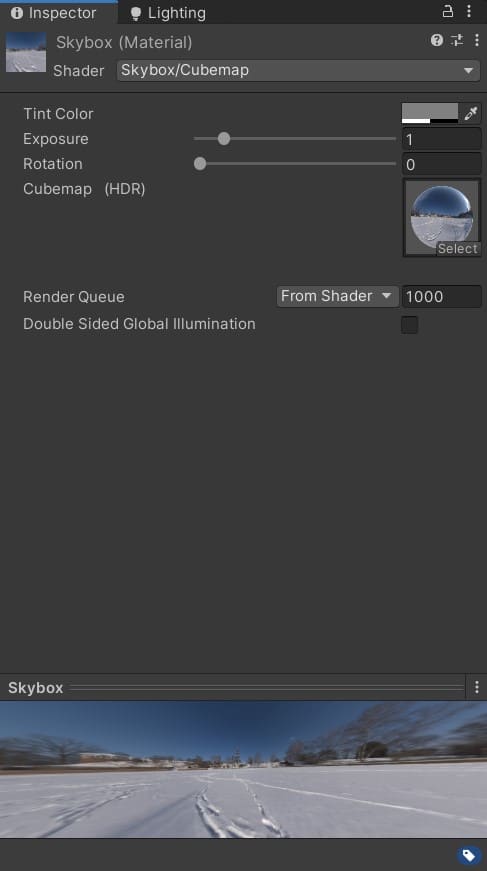
Step:-6
- Select the Skybox from assets, drag and drop the HDRIs file in Cubemap(HDR)

Step:-7
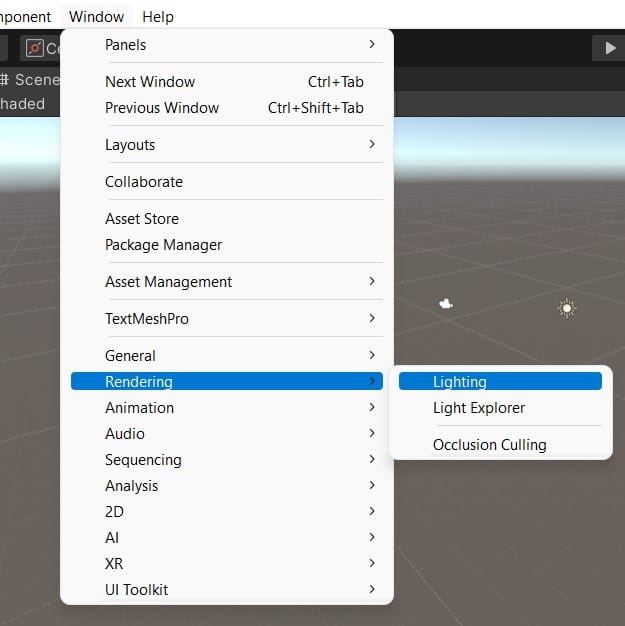
- Goto Window, select Rendering, and select Lighting
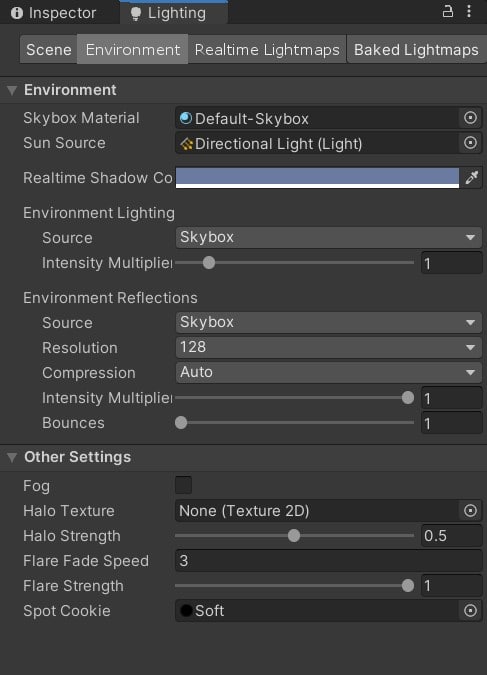
- Goto Lighting tab select Environment
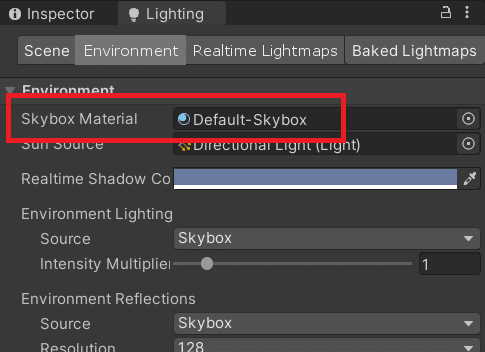
- Drag and drop the Skybox from assets to Skybox Material
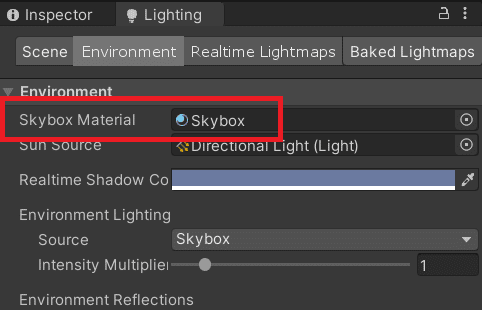
- Skybox is created
Leave a Reply