Digit Recognition using CNN in Python
 By Kartheek Janapati
In this Lecture we will learn about Digit Recognition with CNN in Python.
Digit recognition is one of the most fundamental tasks in computer vision and machine learning. It involves identifying handwritten digits from images, these are of very important applications in postal mail sorting, bank check processing, and form digitization. In this post, we will see how to develop a system for digit recognition using Convolutional Neural Networks in Python.
What is CNN?
Convolutional Neural Networks are a type of deep learning models particularly designed to treat structured grid data, more specifically images. They automatically learn spatial hierarchies of representations from input images through a number of convolutional layers.
Dataset
We will use the MNIST dataset containing 60,000 training images and 10,000 test images of handwritten digits from 0 to 9. Each image is a 28×28 gray scale image.
Also read: Generative Adversarial Network (GAN) in Python – TensorFlow
Steps to Build the Model
- Import Libraries
- Load and Preprocess the Data
- Build the CNN Model
- Compile and Train the Model
- Evaluate the Model
- Make Predictions
Step 1 : Import Libraries
First, we’ll import the necessary libraries.
import numpy as np
import matplotlib.pyplot as plt
import tensorflow as tf
from tensorflow.keras.datasets import mnist
from tensorflow.keras.models import Sequential
from tensorflow.keras.layers import Conv2D, MaxPooling2D, Flatten, Dense
from tensorflow.keras.utils import to_categorical
Step 2 : Load and Preprocess the Data
Next, we’ll load the MNIST dataset and preprocess the data.
# Load the MNIST dataset
(x_train, y_train), (x_test, y_test) = mnist.load_data()

# Normalize the images to a range of 0 to 1
x_train = x_train / 255.0
x_test = x_test / 255.0

# Reshape the images to include the channel dimension (1 for grayscale)
x_train = x_train.reshape(-1, 28, 28, 1)
x_test = x_test.reshape(-1, 28, 28, 1)

# One-hot encode the labels
y_train = to_categorical(y_train, 10)
y_test = to_categorical(y_test, 10)
Output:
Downloading data from https://storage.googleapis.com/tensorflow/tf-keras-datasets/mnist.npz 11490434/11490434 [==============================] – 0s 0us/step
Step 3: Build the CNN Model
We’ll define a simple CNN architecture for our digit recognition task.
model = Sequential([
    Conv2D(32, kernel_size=(3, 3), activation='relu', input_shape=(28, 28, 1)),
    MaxPooling2D(pool_size=(2, 2)),
    Conv2D(64, kernel_size=(3, 3), activation='relu'),
    MaxPooling2D(pool_size=(2, 2)),
    Flatten(),
    Dense(128, activation='relu'),
    Dense(10, activation='softmax')
])
Step 4: Compile and Train the Model
We’ll compile the model using the Adam optimizer and train it on the MNIST dataset.
model.compile(optimizer='adam', loss='categorical_crossentropy', metrics=['accuracy'])

# Train the model
history = model.fit(x_train, y_train, epochs=10, batch_size=128, validation_split=0.2)
Output:
Epoch 1/10
375/375 [==============================] - 41s 106ms/step - loss: 0.2359 - accuracy: 0.9295 - val_loss: 0.0756 - val_accuracy: 0.9775
Epoch 2/10
375/375 [==============================] - 40s 107ms/step - loss: 0.0642 - accuracy: 0.9804 - val_loss: 0.0516 - val_accuracy: 0.9858
Epoch 3/10
375/375 [==============================] - 39s 105ms/step - loss: 0.0451 - accuracy: 0.9860 - val_loss: 0.0525 - val_accuracy: 0.9837
Epoch 4/10
375/375 [==============================] - 39s 103ms/step - loss: 0.0353 - accuracy: 0.9890 - val_loss: 0.0453 - val_accuracy: 0.9866
Epoch 5/10
375/375 [==============================] - 43s 114ms/step - loss: 0.0270 - accuracy: 0.9916 - val_loss: 0.0389 - val_accuracy: 0.9892
Epoch 6/10
375/375 [==============================] - 39s 105ms/step - loss: 0.0209 - accuracy: 0.9933 - val_loss: 0.0368 - val_accuracy: 0.9899
Epoch 7/10
375/375 [==============================] - 39s 104ms/step - loss: 0.0160 - accuracy: 0.9950 - val_loss: 0.0390 - val_accuracy: 0.9892
Epoch 8/10
375/375 [==============================] - 38s 102ms/step - loss: 0.0141 - accuracy: 0.9950 - val_loss: 0.0362 - val_accuracy: 0.9898
Epoch 9/10
375/375 [==============================] - 40s 106ms/step - loss: 0.0106 - accuracy: 0.9964 - val_loss: 0.0514 - val_accuracy: 0.9869
Epoch 10/10
375/375 [==============================] - 38s 102ms/step - loss: 0.0092 - accuracy: 0.9967 - val_loss: 0.0376 - val_accuracy: 0.9911
Step 5: Evaluate the Model
After training, we’ll evaluate the model’s performance on the test dataset.
# Evaluate the model
test_loss, test_acc = model.evaluate(x_test, y_test)
print(f'Test accuracy: {test_acc:.4f}')
Output:
313/313 [==============================] – 3s 9ms/step – loss: 0.0297 – accuracy: 0.9906 Test accuracy: 0.9906
Step 6: Make Predictions
Finally, we’ll use the trained model to make predictions on new images.
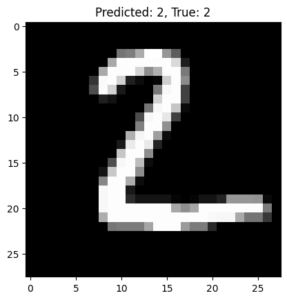
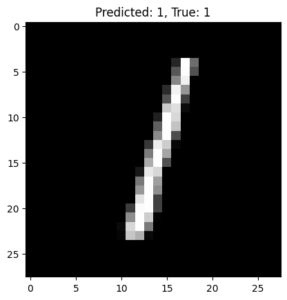
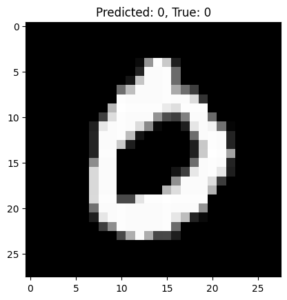
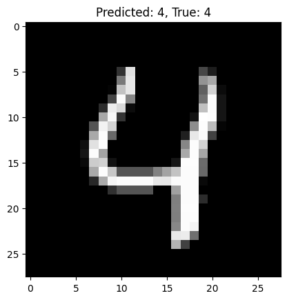
# Predict on the first 5 test images
predictions = model.predict(x_test[:5])

# Display the first 5 test images along with their predicted labels
for i in range(5):
    plt.imshow(x_test[i].reshape(28, 28), cmap='gray')
    plt.title(f'Predicted: {np.argmax(predictions[i])}, True: {np.argmax(y_test[i])}')
    plt.show()
Output:

Conclusion
In this post, we have developed a digits recognition system based on CNNs in Python. We loaded the MNIST dataset, preprocessed it, defined actually a model of a CNN, trained, and evaluated. Deep Neural Networks are very effective means for image recognition problems, and with libraries like TensorFlow and Keras, it becomes quite straightforward to implement and try out different architectural variants.
Leave a Reply