Adjust the opacity of a view in SwiftUI
 By Samim
In this tutorial, we will see how to adjust the opacity of a view in SwiftUI.
The .opacity() modifier in SwiftUI controls opacity, which determines how transparent a view is. It ranges from 0.0 (fully transparent) to 1.0 (fully opaque). This feature helps us to manage visibility and visual hierarchy in our app interfaces.
There are various ways to adjust the opacity of a view in SwiftUI. Below are some methods we can use to adjust the opacity of a view.
Using the opacity() modifier
The opacity modifier directly sets the opacity level of the view. It takes a value from 0.0 (completely transparent) to 1.0 (fully opaque). We can apply this modifier to any SwiftUI view. This is the simplest way to adjust the opacity of a view.
Example
import SwiftUI

struct ContentView: View {
    var body: some View {
        Text("CodeSpeedy")
            .font(.largeTitle)
            .opacity(0.4)
    }
}
In the above program, the .opacity(0.4) modifier is applied to the Text view to display the text “CodeSpeedy” with 40% opacity.
Output:

Using the foregroundColor() modifier
This method changes the text or foreground color of a view while adjusting its opacity. By applying the foregroundColor() modifier with a color and using the opacity() method on the color itself, we can control the transparency of the text or foreground elements.
Example
import SwiftUI

struct ContentView: View {
    var body: some View {
        Text("CodeSpeedy")
            .font(.largeTitle)
            .foregroundColor(Color.mint.opacity(0.4))
    }
}
In the above program, I have used the foregroundColor() modifier to set the color of the text to mint with 40% opacity.
Output:

Using the background() modifier with a color
We can set the background color of a view using the background() modifier. When we provide a color using this modifier, we can adjust the opacity of the color itself by using the opacity() modifier.
This method changes the opacity of the background color while keeping the content fully visible.
Example
import SwiftUI

struct ContentView: View {
    var body: some View {
        Text("CodeSpeedy")
            .font(.largeTitle)
            .padding()
            //Set the background color of the text to blue with an adjusted opacity of 40%
            .background(Color.blue.opacity(0.4))
    }
}
In the above program, I have used the background modifier to set a blue background color with 40% opacity.
Output:

Using the overlay() modifier
The overlay modifier in SwiftUI is used to place additional content on top of an existing view. This can include adding a color, shape, or another view with adjusted opacity, creating an overlay effect on the original view.
Example
import SwiftUI
struct ContentView: View {
var body: some View {
Text("CodeSpeedy")
.font(.largeTitle)
.padding()
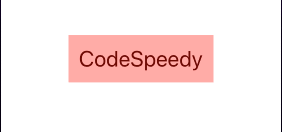
// Applying an overlay with a semi-transparent red color
.overlay(
Color.red.opacity(0.4) // Red color with 40% opacity
)
}
}In the above program, the overlay() modifier will overlay a red color with 40% opacity on the Text view.
Output:
Animating opacity changes
Using the @State property wrapper, we can create a variable that stores the state of opacity. By changing this variable within a withAnimation block, SwiftUI will automatically animate the opacity change. This method is useful for dynamic opacity adjustments, such as toggling between different opacity levels based on user interactions.
Example
import SwiftUI

struct ContentView: View {
    // Define a boolean state variable to track opacity state
    @State private var isOpaque = false

    var body: some View {
        Text("Hello, World!")
            .font(.largeTitle)
            .padding()
            // If isOpaque is true, opacity is 1.0; otherwise, it's 0.5
            .opacity(isOpaque ? 1.0 : 0.4)
            .onTapGesture {
                // On tap, toggle the value of isOpaque with an animation
                withAnimation {
                    self.isOpaque.toggle()
                }
            }
    }
}
In the above program, the state variable isOpaque is used to toggle between two opacity values. The withAnimation block ensures that the opacity change will be animated.
Output:

Adjust opacity dynamically with a slider
Now, I will create a simple SwiftUI view with a text element whose opacity can be adjusted using a slider. The opacity of the text changes based on the value of the slider, allowing users to control how transparent or opaque the text appears.
Example
import SwiftUI

struct ContentView: View {
    // State variable to hold the opacity value, initially set to 0.5
    @State private var customOpacity = 0.5

    var body: some View {
        VStack {
            Text("CodeSpeedy")
                .font(.largeTitle)
                .padding()
                .background(Color.mint)
                // Controlling the opacity of the text using the state variable
                .opacity(customOpacity)

            // Creating a slider that will control the opacity value
            Slider(value: $customOpacity, in: 0...1)
                .padding()
        }
    }
}
Output:

Leave a Reply