Add underline to a text view in SwiftUI
In this tutorial, we will see how to add an underline to a text view in SwiftUI.
We can add an underline to a text view using the .underline() modifier. We can also customize the appearance of the underline like changing the color by using this modifier.
This modifier takes two parameters.
active: A boolean value to indicate whether the text should be underlined or not.color: The color of the underline.
Now, have a look at the syntax below.
.underline(active: Bool, color: Color?)
The above modifier takes a boolean value true or false and a color as its parameter.
Text view with simple underline
Now, I will create a simple text view to show how the underline() modifier works.
import SwiftUI

struct ContentView: View {
    var body: some View {
        Text("Add underline here")
            .font(.title)
            .underline() //To add underline
    }
}
The above code will display the text Add underline here with a line below the text.
Output:

Multiple text views with simple underline
We can also create multiple text views using the ForEach loop and add underline to every text view using the underline() modifier.
Example
import SwiftUI

struct ContentView: View {
    var body: some View {
        VStack(spacing: 20) {
            ForEach(1..<10){ index in
                Text("Add underline here")
                    .font(.title)
                    .underline() //To add underline
            }
        }
    }
}
The above code will display nine text views aligned vertically with underline below the every text views.
Output:

Change the color of the underline
We can change the color of the underline by specifying the color whatever we want the color parameter within the .underline() modifier.
Example
import SwiftUI

struct ContentView: View {
    var body: some View {
        Text("Add underline here")
            .font(.title)
            //To add and change the color of the underline
            .underline(true, color: .red)
    }
}
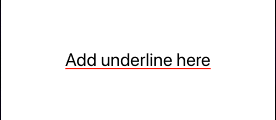
In the above program, I have applied the underline() modifier to the text view and set the color parameter to red. So, it will display a red colored underline below the text.
Output:

Leave a Reply