Add label to a TextField in SwiftUI
 By Samim
In this tutorial, we will see how to add a label to a TextField in SwiftUI.
We can organize the label and TextField in different orientations, either vertically or horizontally using the VStack or HStack, based on our design needs.
Now, follow the methods below to add labels vertically or horizontally.
Vertical Label using VStack
The VStack arranges its contents vertically that means when we place views inside a VStack, they will be displayed one below the other, from top to bottom, in the order they are added.
In this case, the label and the TextField will appear vertically stacked, one on top of the other.
Example
import SwiftUI

struct ContentView: View {
    @State private var text: String = ""

    var body: some View {
        VStack(alignment: .leading) {
            // Text view displaying "The Label:" as a label for the TextField
            Text("The Label:")
                .font(.headline)

            TextField("Placeholder", text: $text)
                .textFieldStyle(RoundedBorderTextFieldStyle())

        }
        .padding()
    }
}
The above code will display a TextField with the text label “The label:” arranged vertically. The label will be on the top of the TextField.
Output:

Horizontal Label using HStack
The HStack arranges its contents horizontally, placing elements side by side.
In this case, the label and the TextField will be displayed side by side from left to right.
Example
import SwiftUI
struct ContentView: View {
@State private var text: String = ""
var body: some View {
HStack {
// Text view displaying "The Label:" as a label for the TextField
Text("The Label:")
.font(.headline)
TextField("Placeholder", text: $text)
.textFieldStyle(RoundedBorderTextFieldStyle())
}
.padding()
}
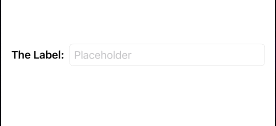
}The above code will display a TextField with the text label “The label:” arranged horizontally. The label will be on the left side of the TextField.
Output:
Leave a Reply