How to initialize @StateObject with parameters in SwiftUI
In this tutorial, we will see how to initialize @StateObject with parameters in SwiftUI.
We use the @StateObject property wrapper to manage the lifecycle of an ObservableObject. It is a little difficult to initialize a @StateObject with parameters.
We can initialize a @StateObject with parameters by creating a custom initializer for our ObservableObject class.
Now, to initialize a @StateObject with parameters in SwiftUI, follow these steps.
Create an ObservableObject
First of all, I will create a class that will conform to the ObservableObject protocol.
This class will hold the data and state that we want to manage using @StateObject property wrapper.
// Define an Observable Object
class MyObject: ObservableObject {
    // Declare a published property to automatically publish changes
    @Published var value: String

    // Initialize the object with a value
    init(value: String) {
        self.value = value
    }
}
In the above code, I have created a simple MyObject class that has a value property of type String.
I also have created an initializer that will take a String parameter and set the value property accordingly.
Create the View
Now, I will create a SwiftUI view where we want to use this @StateObject. This view will initialize the @StateObject with parameters.
This view will display or interact with the data stored in our ObservableObject.
struct ContentView: View {
    // Declare a StateObject property to manage the lifecycle of MyObject
    @StateObject var myObject: MyObject

    // Custom initializer to initialize MyObject with a value
    init(value: String) {
        // Use StateObject property wrapper to initialize myObject
        _myObject = StateObject(wrappedValue: MyObject(value: value))
    }

    var body: some View {
        // Display the value of myObject inside a Text view
        Text("Value: \(myObject.value)")
    }
}
In the above code, I have declared a property myObject with the @StateObject property wrapper. This property wrapper is used to manage the lifecycle of the MyObject instance.
Then, I have defined a custom initializer init(value: String) to initialize myObject with a provided value.
Inside the initializer, I have used the _myObject to directly access the @StateObject and set it up with a new instance of MyObject using the given value.
Entry Point and Initial View Setup
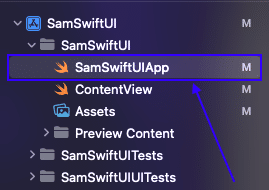
Now, I will navigate to the app file, where I will set the ContentView as the root view of the main window, and pass a string value as a parameter.

Simply, add the following code to this file and modify it like below to achieve the task.
import SwiftUI

@main
struct SamSwiftUIApp: App {
    var body: some Scene {
        WindowGroup {
            ContentView(value: "Welcome To CodeSpeedy")
        }
    }
}
Now, when we launch the app, it will display the ContentView with the initial value “Welcome to CodeSpeedy“.
Now, Have a look at the complete code below.
import SwiftUI

class MyObject: ObservableObject {
    @Published var value: String

    init(value: String) {
        self.value = value
    }
}

struct ContentView: View {
    @StateObject var myObject: MyObject

    init(value: String) {
        _myObject = StateObject(wrappedValue: MyObject(value: value))
    }

    var body: some View {
        Text("Value: \(myObject.value)")
    }
}
Output:

Leave a Reply